


Table of contents
Introduction
Power Automate, part of the Microsoft Power Platform, empowers users to automate repetitive tasks and workflows. Its user-friendly interface makes it an ideal choice for creating automated solutions without the need for extensive coding.
Scenario
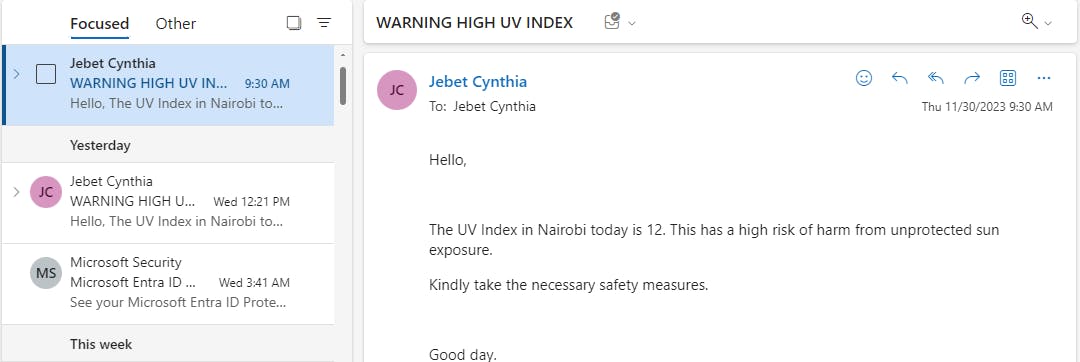
Imagine you have the responsibility to keep Nairobi residents informed about daily weather conditions, with a particular focus on the UV Index. The goal is to send out email alerts every day. If the UV Index exceeds or equals 9, an email should be dispatched providing details on the UV Index. Conversely, if the UV Index is less than 9, an email containing the general weather conditions should be sent.
Create the "Nairobi Weather Flow"
We'll create a flow named "Nairobi Weather Flow" utilizing Power Automate capabilities to send emails via Outlook.
1. Setting Up a Scheduled Flow: Click on "Create" and select "Scheduled Cloud Flow"
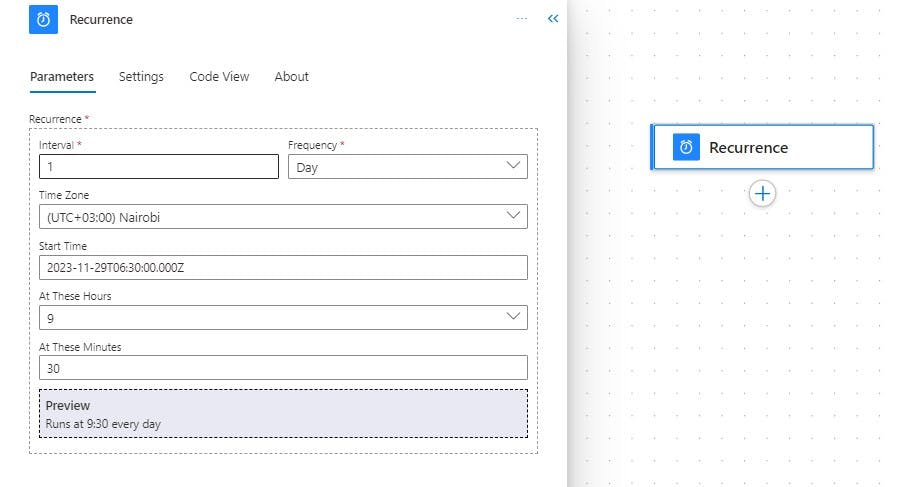
2. Set Up a Trigger: Name the flow “Nairobi Weather Flow” and set the frequency as shown below then click "Create."
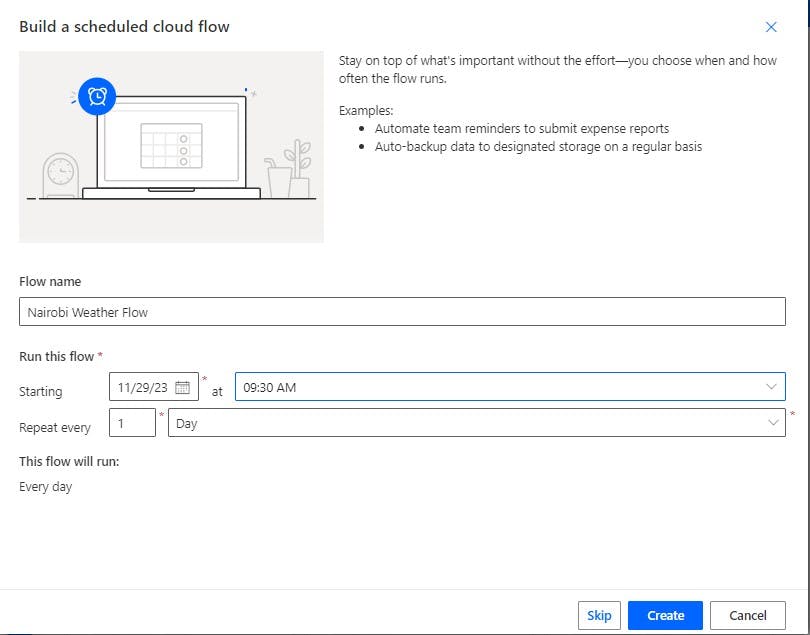
You can go ahead and change to the desired Time Zone in the next step.
3. Retrieving MSN Weather Forecast: Integrate the MSN Weather connector to retrieve the forecast for Nairobi, Kenya, for the current day.
Add an action to the flow.
Search for and choose the "MSN Weather" connector.
Select the "Get forecast for today" action.
In the “Location” field, enter “Nairobi, Kenya”.

4. Add a Condition: Add a new condition step and use the UV Index dynamic content in the condition.

Set the condition to check UV index is greater than or equal to 9.
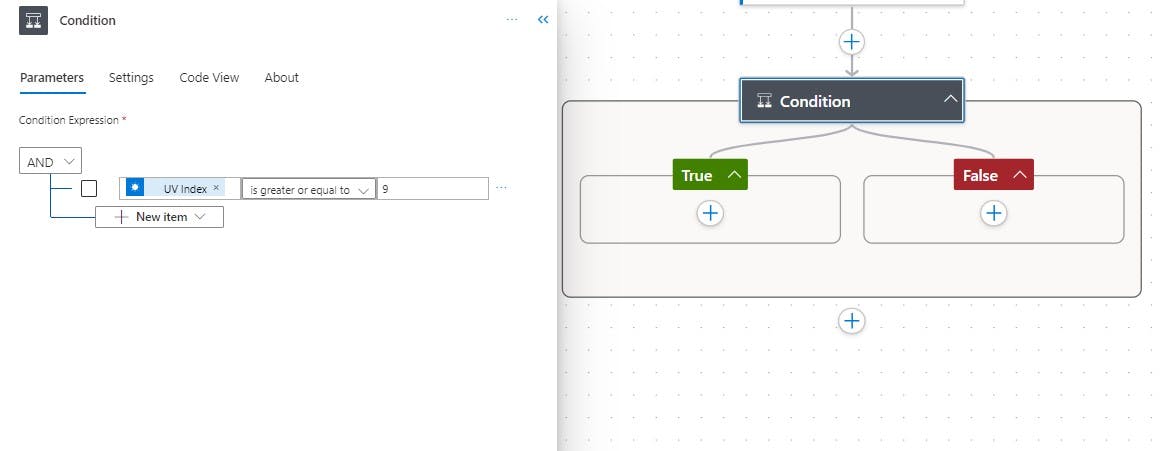
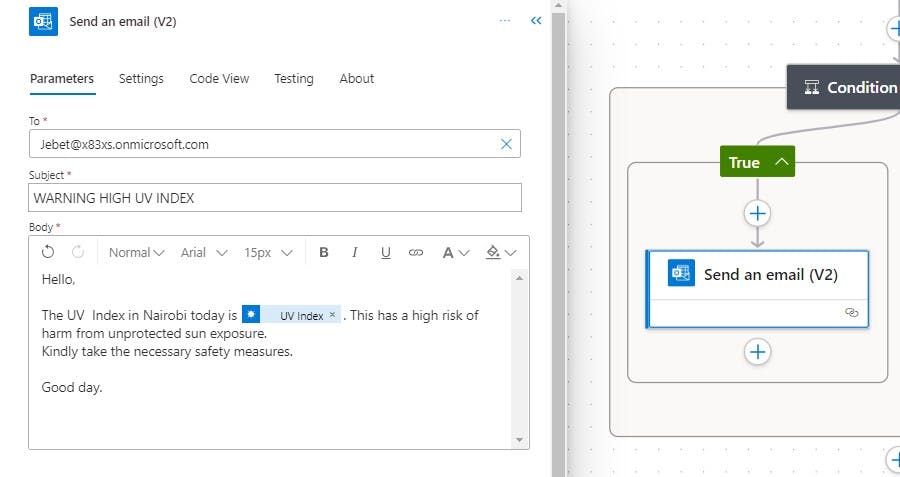
5. Send Email for UV Index >= 9: Inside the "True" branch of the condition, add an action to send an email.
Choose the "Office 365 Outlook" connector.
Select the "Send an email" action.
Configure the action to send an email to your desired email address.
Use the UV Index dynamic content in the email body.
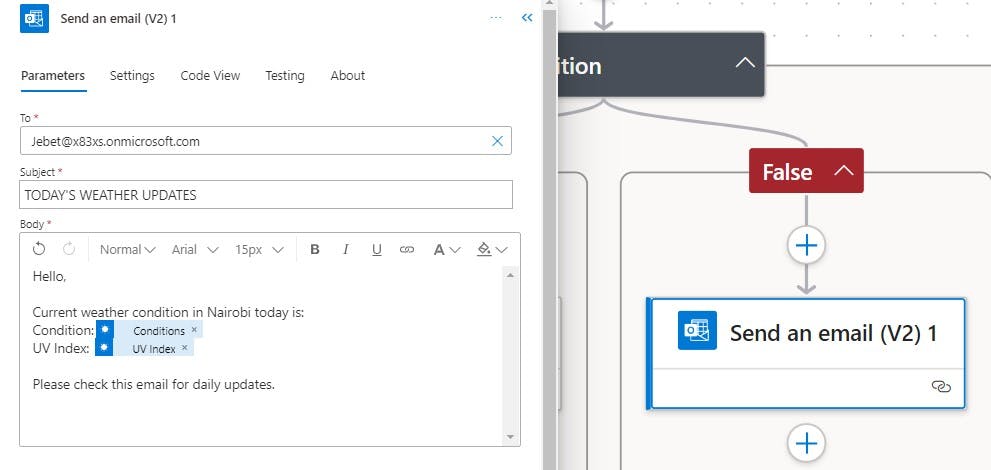
6. Send Email for UV Index < 9: Inside the "False" branch of the condition, add an action to send an email.
Again, choose the "Office 365 Outlook" connector.
Select the "Send an email" action.
Configure the action to send an email to your desired email address.
Use the Conditions dynamic content in the email body.
7. Save and Test the Flow: Test the flow by manually triggering it to ascertain it runs successfully.
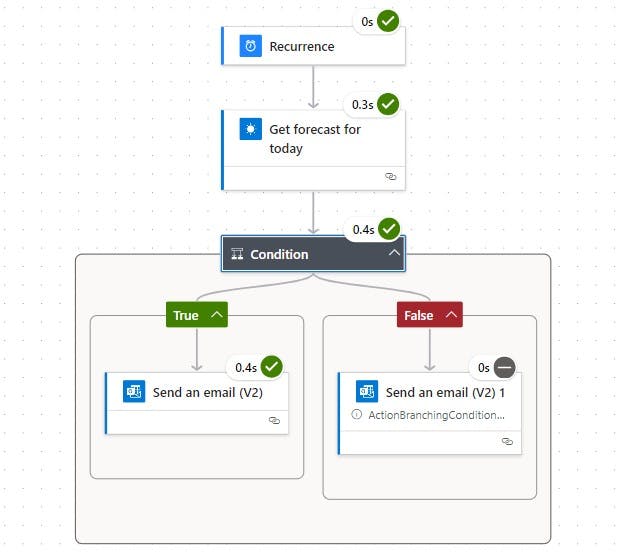
Depending on the UV Index condition, you should receive an email in the specified email account at the time you specified.